|
|
Preparation |
|
In order to install a network printer, you must know your printer's Manufacturer and Model name and you must know your samba username and samba password. If you don't have the username and the password, please email ecehelp to register a samba account.
- The Manufacturer and Model Name can be found on the front panel of the printer, for example, HP LaserJet 4000N .
- Communication group samba/printer server is alpha.comm.utoronto.ca, Waves group samba/printer server is emserver.waves.utoronto.ca and Control group samba/printer server is alfheim.control.utoronto.ca
Before setup your printer, mapping your network partition from the samba/printer server is required. |
| |
| |
|
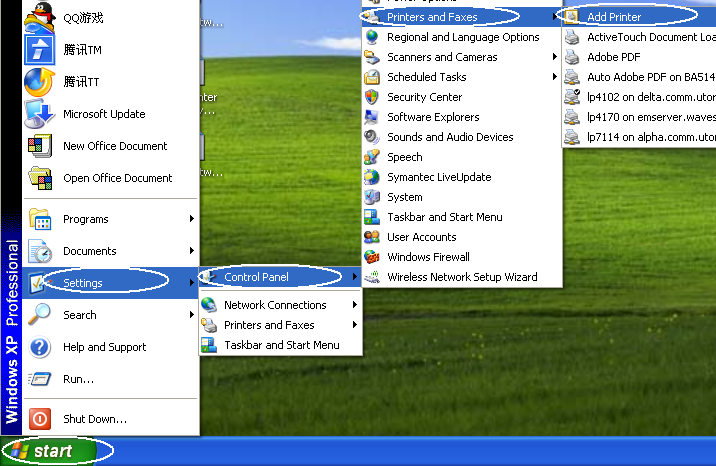
1. Click on the Start button, then click Control Panel, then click Printers and Faxes, then click Add Printer. |
|
|
| |
|
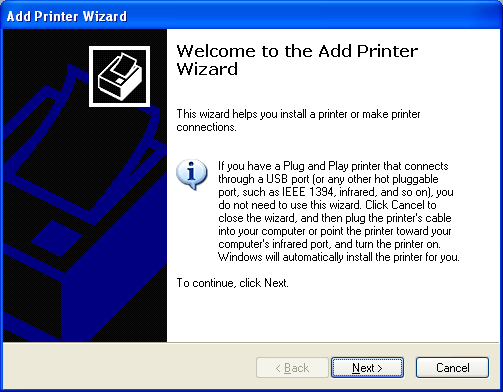
2. A new Add Printer Wizard window opens. Click Next to start. |
 |
|
| |
|
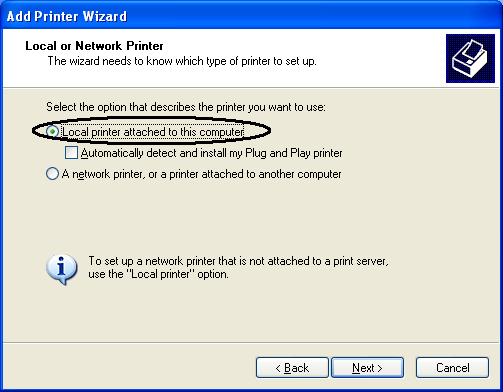
3. Select "Local printer attached to this computer" but DON'T enable "Automatically detect and install my Plug and Play printer"
4. Then click Next to continue. |
 |
|
| |
|
5.Select "Create a new port" and choose "Local Port" from the popup menu
6. Click Next to continue. |
 |
|
| |
|
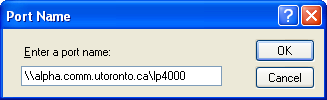
7. input \\SERVER\PRINTER, where SERVER is alpha.comm.utoronto.ca for communication group users, emserver.waves.utoronto.ca for waves group users and flames.eecg.utoronto.ca for eecg group. PRINTER is named as lpxxxx, where xxxx is the office number. If you are not sure what is your printer name , please email ecehelp for information. For control group users, the printers are \\alfheim.control.utoronto.ca\lw6
8.Click OK to continue. |
 |
|
| |
|
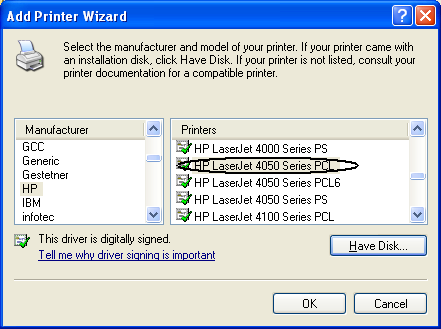
9. You must now select the printer's manufacturer and model.
10. OPTIONAL: If your printer is listed but you have more than one printer model to choose from, please select the model with PS, if available.
11. If your printer is NOT automatically detected, Click Windows Update button. Windows may take couple minutes to search the printer driver from Microsoft support site. |
 |
|
| |
Note: If you still do not find your printer on the list after windows update, please email ecehelp for help.
|
| |
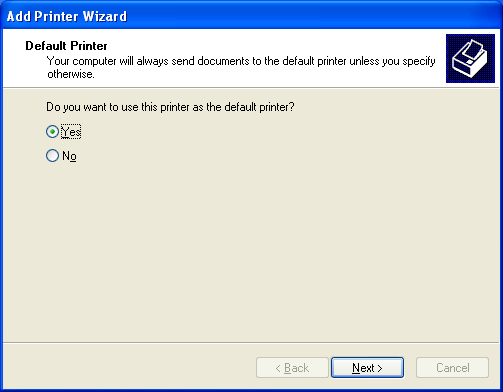
12. Select Yes if you want to use the printer as the default printer. Click Next to continue. |
 |
|
| |
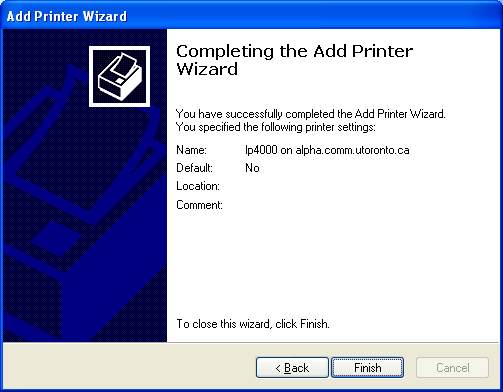
13. Click Finish to continue. |
 |
|
| |
|
If you can print a test page, you have successfully installed the printer.
Please make sure you can access your network parition (unix home) from the samba server before printing. |
|
|
|